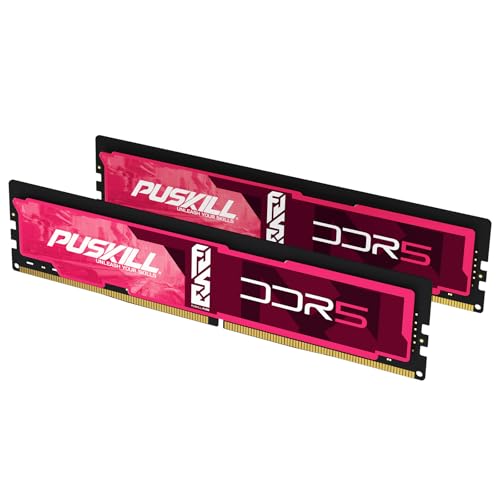


A motherboard memory QVL is a list of RAM kits the vendor tested in stated configurations. Use it to reduce purchase risk, especially for high-speed DDR5, high-capacity modules, or four-DIMM builds. It is not a complete list of every compatible kit and it is not a lifetime guarantee.
The product examples above are starting points only. Before buying, match the complete manufacturer part number against the QVL for your exact motherboard and CPU generation.
The five-minute QVL workflow
- 1Find the exact motherboard model and revision printed on the board or box.
- 2Open the vendor support page and choose Memory Support, QVL, or CPU/Memory Support.
- 3Select the installed CPU generation if the page provides a processor filter.
- 4Copy the complete RAM part number from the retailer or memory-vendor page.
- 5Match capacity, module count, speed, profile, and supported socket population.
- 6Check whether the QVL notes a tested BIOS version.
- 7Buy the same kit configuration, install it in the documented slots, and test it.
ASUS describes its QVL as a list of memory verified for a motherboard and provides filters for vendor, size, speed, socket support, and type. Other vendors use different interfaces, but the matching logic is the same.
Source: ASUS motherboard memory QVL instructions.
Where each motherboard vendor puts the list
Interfaces change, but these are the common support paths:
| Vendor | Common route | What to select |
|---|---|---|
| ASUS | Product Support → CPU / Memory Support | CPU generation, memory type, size, speed |
| MSI | Support → Compatibility → Memory Support | CPU family and exact module model |
| Gigabyte | Support → Memory Support List | Board revision and CPU generation |
| ASRock | Support → Memory QVL | Processor family and memory generation |
MSI also instructs users to follow the board manual for slot population, normally A2 for one module and A2/B2 for two modules. Source: MSI memory compatibility and installation guidance.
Decode the part number, not the marketing name
Two listings can both say 'Vengeance DDR5-6000 32GB' while using different profiles, timings, module counts, or revisions. Search the full manufacturer code, including the suffix.
| Field | Example | Why it matters |
|---|---|---|
| Total capacity | 32GB | Must fit the platform limit |
| Kit layout | 2x16GB | QVL may validate two modules, not four |
| Speed | 6000 MT/s | Often an XMP or EXPO overclock |
| Timings | CL30 | Different suffixes can mean different bins |
| Profile | EXPO or XMP | Match the intended platform and BIOS support |
| DIMM sockets | 1/2/4 modules | Tested population can change the stable speed |
If a retailer truncates the model number, open the manufacturer page or packaging image before purchasing.
Worked part-number example
Suppose a retailer title says 32GB DDR5-6000 CL30 RGB and the full illustrative code is:
BRAND5-6000-C30-16GX2-EXPO-BLK
Read it as a checklist, not as a universal naming standard:
| Code section | Likely meaning | What must match |
|---|---|---|
| 6000 | Advertised data rate | QVL tested speed |
| C30 | CAS timing family | Exact suffix when the QVL lists it |
| 16GX2 | Two 16GB modules, 32GB total | Module count and density |
| EXPO | AMD-oriented profile | Intended platform and BIOS profile |
| BLK | Color or heat-spreader variant | Confirm whether it changes the tested SKU |
Now compare the complete code character by character. A listing ending in XMP, 32GX1, or a different timing suffix is a different purchase even if the marketing title looks nearly identical.
Use this worksheet before Buy:
- 1Board model and revision: ______
- 2CPU generation: ______
- 3BIOS version required by QVL: ______
- 4Full RAM part number: ______
- 5Tested capacity and DIMM count: ______
- 6Tested sockets: ______
- 7XMP, EXPO, or JEDEC setting: ______
Choose the correct CPU memory list
One motherboard can support several processor generations, and its memory controller sits in the CPU. Vendors therefore sometimes publish separate QVL views for different CPU families. A kit validated with one processor generation is useful evidence, but it is not the same test as your processor.
This is especially important when:
- using a first-generation CPU on a newer socket
- buying 24GB or 48GB modules that needed later BIOS support
- selecting very high XMP or EXPO speeds
- filling all four DIMM slots
What the DIMM count column really means
A QVL mark for one or two sockets means the vendor tested that module count. It does not automatically validate four modules or two separately purchased kits.
For a 64GB build, prefer one matched 2x32GB kit over two 2x16GB kits. For 96GB, prefer 2x48GB. Four DDR5 DIMMs increase electrical load and can require lower frequency even when every individual module is genuine.
Read Four-Stick DDR5 Stability before planning a full-slot build.
Does unlisted RAM work?
Often, yes. Vendors cannot test every memory SKU, density, color variant, and later revision. Standards-compliant RAM can work even when it is absent from the list.
Use this risk ladder:
| Situation | QVL importance |
|---|---|
| JEDEC speed, two common modules | Helpful |
| Mainstream 2-DIMM XMP/EXPO kit | Strongly preferred |
| High density or new module size | Strongly preferred |
| Four DIMMs or extreme speed | Treat exact validation as a purchase requirement |
| Server ECC UDIMM/RDIMM | Follow the system qualification list and population manual |
If an unlisted kit is much cheaper, buy only with a good return policy and enough time to test. Use the RAM Finder to narrow the specification, then the QVL tool for exact verification.
Motherboard QVL versus memory-vendor compatibility list
A motherboard QVL answers whether the board vendor tested a memory kit on a specific board configuration. A memory-vendor list answers whether the memory company validated or recommends its module for a board. They are complementary evidence, not interchangeable guarantees.
Use both when available:
- 1Start with the motherboard QVL for CPU generation, BIOS, and DIMM population.
- 2Cross-check the memory vendor configurator for the exact part number.
- 3Prefer the configuration where module count and capacity match on both sides.
- 4Keep the return window and run a post-install memory test.
A QVL does not guarantee stability
QVL testing occurred with a particular sample, CPU, BIOS, and socket population. Your CPU memory controller, firmware version, cooler pressure, and settings can differ. XMP and EXPO also remain memory overclocking profiles.
After installation:
- 1Boot once at defaults and confirm capacity.
- 2Update BIOS if the vendor recommends it.
- 3Enable the intended profile.
- 4Confirm the effective speed in the operating system.
- 5Run a dedicated memory test.
- 6If errors appear, disable the profile, test modules individually, and verify slots.
ASUS troubleshooting similarly recommends reseating modules, testing one module, using recommended slots, and consulting the QVL when a system does not boot.
Source: ASUS no-boot memory troubleshooting.
Common QVL mistakes
- Searching the brand name instead of the full part number.
- Ignoring the CPU-generation selector.
- Assuming a 2-DIMM result validates four DIMMs.
- Buying two separate kits because each kit is listed.
- Confusing DDR5 UDIMM, ECC UDIMM, RDIMM, SODIMM, and CUDIMM.
- Assuming the advertised speed is automatic or guaranteed.
- Ignoring BIOS notes for newer capacities.
Bottom line
Match the exact part number, CPU generation, capacity, module count, speed, profile, and tested socket population. A QVL lowers uncertainty; it does not replace correct installation or a post-purchase memory test.